
ADLER mountain hut effect
What shabby chic is for furniture, the mountain hut look is for wood facades. What both applications have in common is that great colour effects are created from different coloured paints. But what is behind the mountain hut effect?


 and then in the colour Kiefer (pine)")
 and in the colour ST 05/4 Silberrücken (silverback).")

Mountain huts are exposed to UV radiation and other environment factors the whole year round. The result is often wood facades that become greyed and scorched with interesting colour effects. But this requires time and patience, because these unique facades do not develop overnight. Or do they? With the new mountain hut effect from ADLER you can create this effect with new wood and fully according to your taste in just a few steps. Nor do you have to use any extraordinary products, but instead simply apply Pullex 3in1-Lasur by brush in two different colours. And ADLER shows you step by step how this effect works:
Steps
-
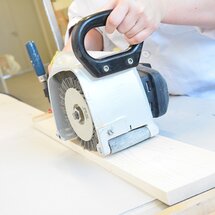
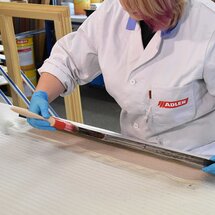
STEP 1: PREPARATION
Brush untreated spruce timber with the scrubbing machine or use spruce timber that has already been brushed. The areas being painted must be dry, clean and dust-free. For this colour version you need the Pullex 3in1 Lasur tinted to the colour RAL 9005 Tiefschwarz (deep black) and in the colour teak.
-
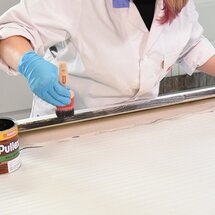
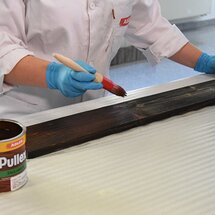
STEP 2: FIRST COAT
Paint the brushed spruce timber with Pullex 3in1 in the colour RAL 9005 Tiefschwarz (deep black). The paint is easiest to apply with the Solvamaxx-Pinsel(brush). The edges are coated first.
-
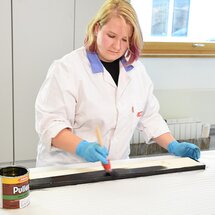
You can then paint the large area in full. Allow the board to dry off for 4 to 6 hours. After this time the board is not yet dried through.
-
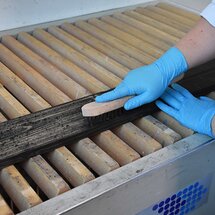
STEP 3: BRUSHING AFTER THE FIRST COAT
Brush the wood whilst still damp. The best result is achieved by hand with a wire brush. You can also work against the grain without any worry. Remove the resulting sanding dust and let the wood dry through for another 6 hours.
-
STEP 4: SECOND COAT
The second coat is done using Pullex 3in1-Lasur in the colour Teak (teak). Teak will give the wood a reddish sheen. Proceed as you did with the first coat: First the edges...
-
...then the areas in between. Allow the completely painted boards to dry overnight (approx. 12 hours).
-
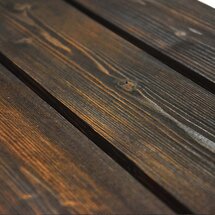
The individual mountain hut look is complete! It is recreated from the reddish appearance of a sunburnt mountain hut.
-
OTHER VARIATIONS
A somewhat browny-yellower effect is achieved if you first paint on Pullex 3in1-Lasur in the colour RAL 9005 Tiefschwarz (deep black) and then in the colour Kiefer (pine).
Do you want to achieve a surface that is rather light and greyed? Then use Pullex 3in1-Lasur in the colour RAL 7039 Platingrau (platinum grey) and in the colour ST 05/4 Silberrücken (silverback).Products used
Pullex 3in1 Lasur:
Version 1: Colour RAL 9005 Tiefschwarz (deep black) and in the colour Teak (teak)
Version 2: Colour RAL 9005 Tiefschwarz (deep black) and in the colour Kiefer (pine)
Version 3: Colour RAL 7036 Platingrau (platinum grey) and in the colour ST 05/4 Silberrücken (silverback)

© by adler-lacke.com